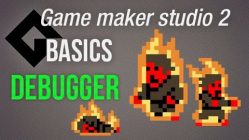
This basics video tutorial shows you the difference is between the regular collision with the bounding box and advanced hitboxes in GameMaker Studio.
Why is that relevant?
Well, the bounding box is still the easiest way to setup collision between two objects, which is absolute fundamental knowledge to have. Image it like this: Every object has (when it has a sprite/image assigned) a bound box, which is simply a rectangle defining its outer borders. That rectangle has 4 points which fixate this bounding box which can be manually changed. That system is already quite efficient for simple encounter like a player bumping into an enemy or a projectile flying towards a target object.
The downsize is the you cannot make an artifical sensor area, which is for example a line, a circle or another rectangle. Here hitboxes come into place which are an additional fundamental tool to check for collisions without the hassle of an bounding box stuck to the sprite assigned. You can of course use multiple checks which makes this advanced approach more versatile.
▶ Gamemaker Studio: https://www.yoyogames.com/get
▶ Trial limitations: https://help.yoyogames.com/hc/en-us/articles/230407528-GameMaker-Studio-2-Trial-Limitations
♥ My free game Clunky souls:
https://1up-indie2.itch.io/clunky-souls
♥ My assets:
Get some assets at itch.io https://1up-indie2.itch.io/
♥ Support me and get fresh game art and game maker projects every month:
https://www.patreon.com/1upindie
Follow me on:
https://www.instagram.com/1upindie
https://twitter.com/1upIndie
https://discord.gg/gvr98nb
Gamemaker Basics


Add comment